

Please, have in mind that SpyHunter offers a free 7-day Trial version with full functionality. Credit card is required, no charge upfront.
Can’t Remove Do not ignore this high priority message pop-ups?
Are you getting bombarded with “Do not ignore this high priority message” alerts? Well, you can thank a PUP for their unwanted display. Yes, your system is no longer infection-free. It harbors a PUP. Or, a potentially unwanted program. These are invasive tools that wreck your system’s well-being. They make a mess, as well as threaten your privacy. But back to the alerts. First off, they’re utter fakes. Don’t believe them for a second! They’re part of scare tactics that often prove quite successful. Don’t turn into a victim by falling for them. The cyber criminals behind the PUP set a trap for you. Make sure not to fall in. Acknowledge these warnings as the blatant lies, they are. As soon as they start taking over your screen, take action. Accept, there’s now an infection, lurking on your PC. Find its exact hiding place. When you do, get rid of the PUP at once. The sooner you do, the better. The infection’s prompt removal earns you the gratitude of your future self.

How did I get infected with?
As explained, the “Do not ignore this high priority message” fake alerts appear due to a PUP. But how do you suppose it appeared? These programs don’t pop out of the blue. In fact, they cannot enter a system without the user’s permission. That’s right. If they’re to access your system, you have to approve it. That begs the following question. Do you remember approving the PUP’s entry? Well, you may not recall, but you did. You don’t take all the blame, though. These tools aren’t particularly straightforward when it comes to seeking access. They’re the exact opposite. Think about it. If they’re not, you can deny them. And, they can’t have you rejecting them. So, instead of outright asking approval, they choose a different approach. They still ask you for consent. But they do it in the most covert way possible. They turn to the old but gold means of infiltration to assist in their nefarious ways. That includes the use of corrupted links, spam emails, freeware. The infection can even pretend to be a bogus update. Like, Java or Adobe Flash Player. The only way you can make the distinction, between a fake and the real deal, is caution. Apply extra attention, every time you allow a tool, update, anything, into your system. It goes a long way, and it can save you an avalanche of trouble. Always take the time to read the terms and conditions. Look for the fine print, and double-check everything. Caution pays off. Carelessness takes you down the path of problems. It tends to provide a one-way street to infections. Choose wisely.
Why are these ads dangerous?
The “Do not ignore this high priority message” fake alerts are not without purpose. As explained, they use scare tactics to get you into a frenzy. And, in your panicked state, act against your best interest. The tool tries to convince you that your computer is in grave danger! Then, suggests, you call a support line that will, supposedly, help you “fix” everything. And, do you know what this support line fixes? Nothing. It costs you money. And, affects your system in a negative way. You gain nothing but problems, if you trust the bogus alert’s “helpful” suggestions. The fake support number “fixes” fake problems. It’s a blatant support scam. The only real problem, you face, is the PUP flooding your screen with fraudulent alerts. There aren’t enough ways to stress this: Don’t fall for this treachery! Keep your cool, and remain level-headed, when faced with these lies. The “Do not ignore this high priority message” fake alerts reveal nothing but the presence of a cyber threat. They’re a clue. A clue that your system harbors an infection. Don’t ignore it, but heed and act on it. Find the hiding place of the dreadful infection ASAP. Then, remove it on discovery. The sooner you delete the PUP, the better.
How Can I Remove Do not ignore this high priority message Pop-ups?
If you perform exactly the steps below you should be able to remove the infection. Please, follow the procedures in the exact order. Please, consider to print this guide or have another computer at your disposal. You will NOT need any USB sticks or CDs.
STEP 1: Uninstall suspicious software from your Add\Remove Programs

Please, have in mind that SpyHunter offers a free 7-day Trial version with full functionality. Credit card is required, no charge upfront.
STEP 2: Delete unknown add-ons from Chrome, Firefox or IE
STEP 3: Permanently Remove Do not ignore this high priority message from the windows registry.
STEP 1 : Uninstall unknown programs from Your Computer
Simultaneously press the Windows Logo Button and then “R” to open the Run Command

Type “Appwiz.cpl”

Locate the any unknown program and click on uninstall/change. To facilitate the search you can sort the programs by date. review the most recent installed programs first. In general you should remove all unknown programs.
STEP 2 : Remove add-ons and extensions from Chrome, Firefox or IE
Remove from Google Chrome
- In the Main Menu, select Tools—> Extensions
- Remove any unknown extension by clicking on the little recycle bin
- If you are not able to delete the extension then navigate to C:\Users\”computer name“\AppData\Local\Google\Chrome\User Data\Default\Extensions\and review the folders one by one.
- Reset Google Chrome by Deleting the current user to make sure nothing is left behind

- If you are using the latest chrome version you need to do the following
- go to settings – Add person

- choose a preferred name.
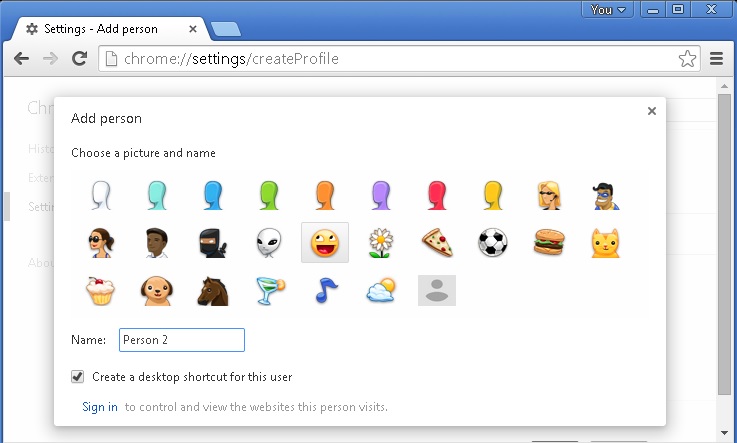
- then go back and remove person 1
- Chrome should be malware free now
Remove from Mozilla Firefox
- Open Firefox
- Press simultaneously Ctrl+Shift+A
- Disable and remove any unknown add on
- Open the Firefox’s Help Menu
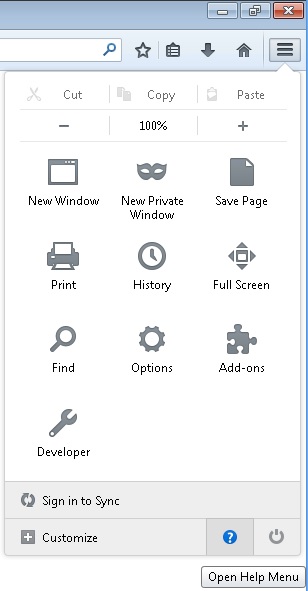
- Then Troubleshoot information
- Click on Reset Firefox

Remove from Internet Explorer
- Open IE
- On the Upper Right Corner Click on the Gear Icon
- Go to Toolbars and Extensions
- Disable any suspicious extension.
- If the disable button is gray, you need to go to your Windows Registry and delete the corresponding CLSID
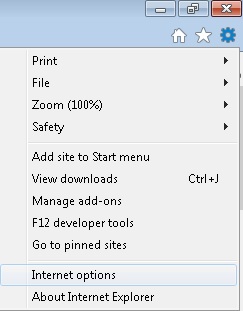
- On the Upper Right Corner of Internet Explorer Click on the Gear Icon.
- Click on Internet options
- Select the Advanced tab and click on Reset.
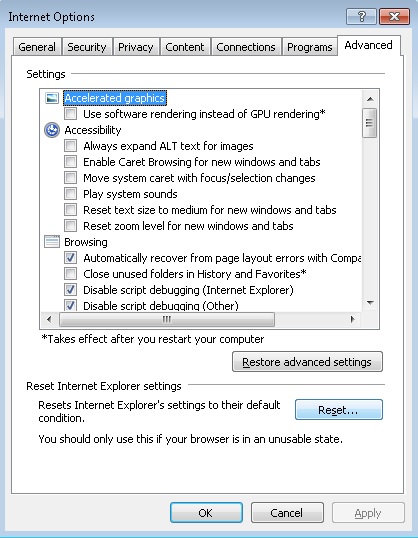
- Check the “Delete Personal Settings Tab” and then Reset

- Close IE
Permanently Remove Do not ignore this high priority message Leftovers
To make sure manual removal is successful, we recommend to use a free scanner of any professional antimalware program to identify any registry leftovers or temporary files.